
 6 months ago
178
6 months ago
178
PROTECT YOUR DNA WITH QUANTUM TECHNOLOGY
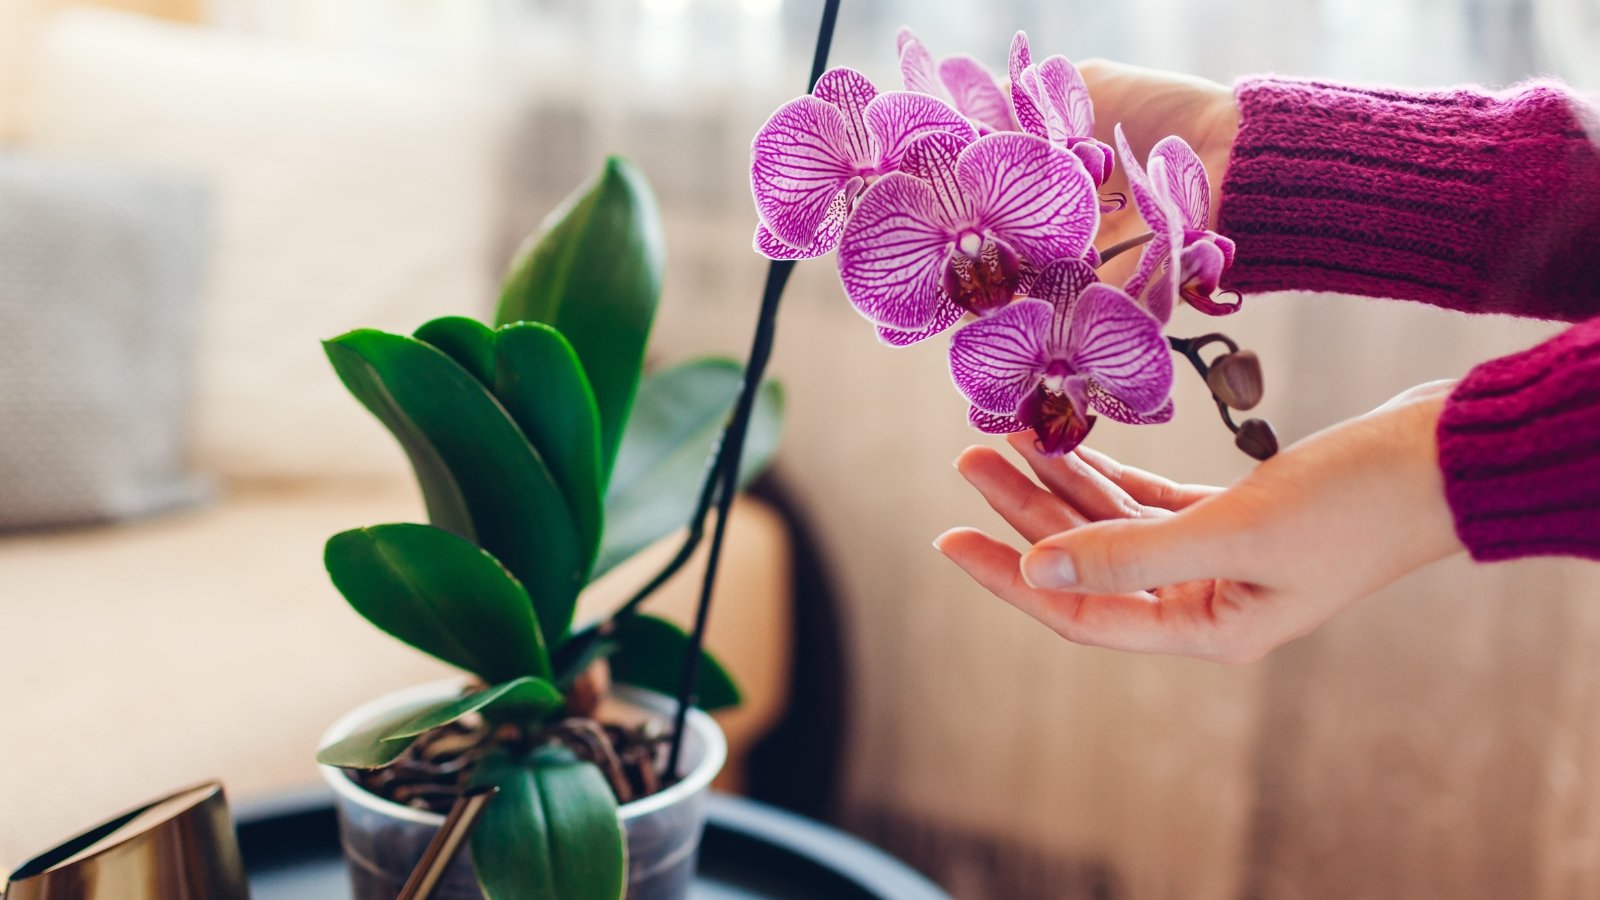
Orgo-Life the new way to the future Advertising by AdpathwayThere are more orchids than one can count! Around 28,000 species exist worldwide, and there are many hybrids and cultivars available from plant nurseries and online retailers. Each type requires different care to thrive—some grow on the ground, others thrive on trees, and a few tolerate incredibly dry conditions.
No matter which type you have, those beautiful flower stalks will eventually shrivel up and turn brown. This doesn’t usually mean the orchid is dead. Rather, it’s just resting until a new flower stalk emerges.
For orchids that are looking a bit sad, there are steps you can take to revive them. Getting orchids to flower again is a sought-after skill, so why not take up the 30-day orchid revival challenge? Follow these steps to encourage new blooms in your orchid in under a month.

Step 1: Inspect the Sticks
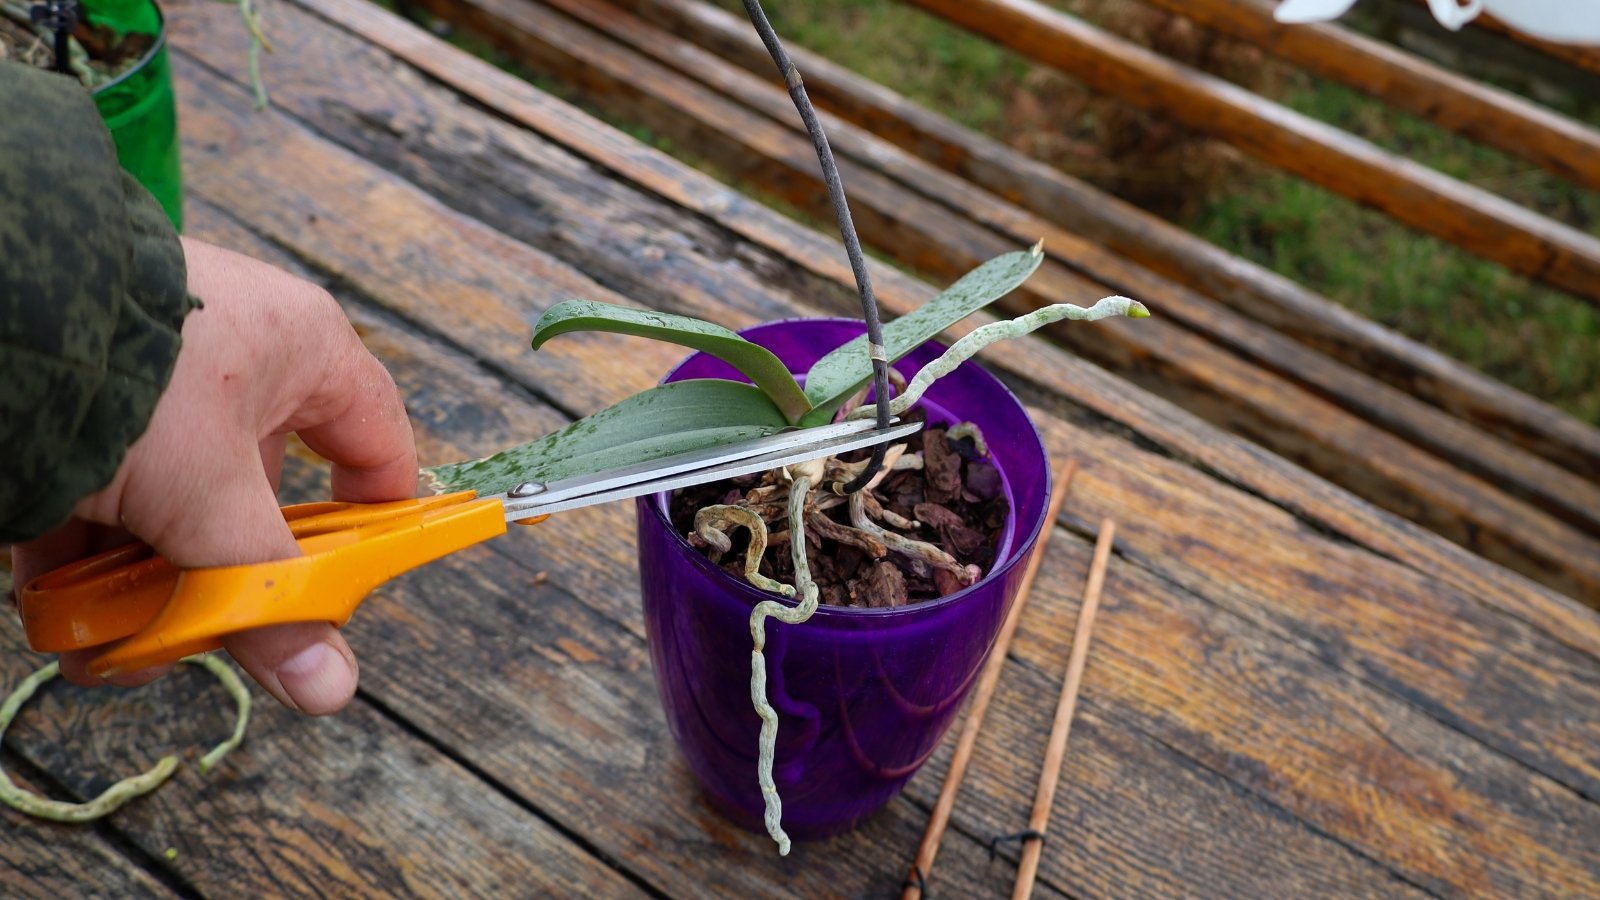 Cutting above nodes helps redirect energy to growth.
The first step in the orchid revival challenge is to decide your plan of attack based on the flower stalk’s appearance.
After blooming, orchid flowering spikes may stay green or turn brown and brittle. Some types, like moth orchids, may rebloom from the same sticks, while others need to grow new ones for fresh blooms. Inspect the flowering sticks first, then decide whether or not to prune them.
If the sticks are brown and brittle, cut them off at their base. Avoid harming any of the green, tender leaves, and use sharp pruners to slice cleanly through the stems.
If the stems are green, cut them back to the first node from the base. Use sterile pruners and cut above the node, where the stem grows larger in diameter. Sterilize pruners with rubbing alcohol, and let them dry fully before using them on the flowering stems.
Removing the dead growth will encourage the orchid plants to redirect energy towards sprouting healthy roots and leaves. To complete the orchid revival challenge, you must remove any rotting, dead, or damaged parts to make room for new growth.
Step 2: Remove Orchid from Pot
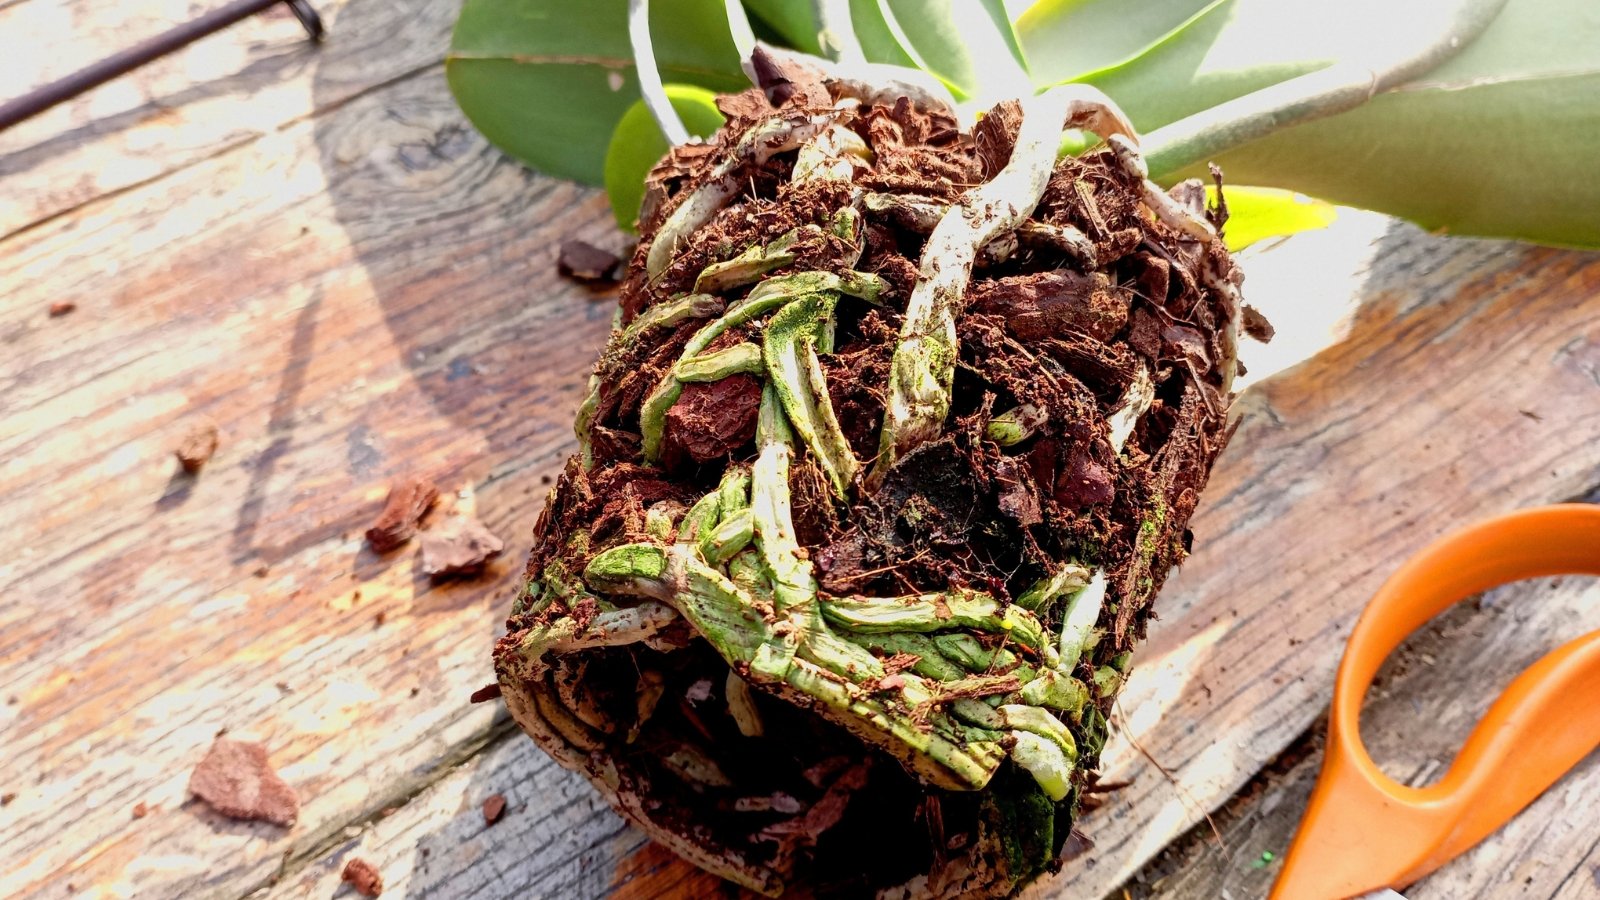 Cramped roots often rot without proper new soil.
Store-bought orchids often grow in cramped conditions where their roots rot shortly after sprouting. They may decline after you bring them home, and this is likely one of the reasons why. Cramped, overwatered roots rot, turning mushy and black.
Start by removing the suffering orchid from its pot. If you recently repotted the orchid, you don’t need to do this step. If the orchid is struggling and it came from the store, a repot is a must for long-term growing success.
Gently take out the orchid, and remove the potting material from the roots. Remove bark, moss, and soil, taking care not to damage the roots or any remaining leaves.
If the plant won’t come out of the plastic pot, use scissors or shears to cut open the pot and remove the orchid. Cut close to the pot so you don’t snip any of the remaining live roots.
Step 3: Cut Off Rotting Roots
 Trim all mushy roots, keeping only the healthy.
Rotting roots appear yellow, black, and shriveled. When they sit in wet, soggy conditions for too long, they begin to rot and turn mushy. Use sterile pruners to remove each and every dead root, leaving only live ones remaining.
Far-gone orchids may not have any healthy roots, but they’ll possibly have live leaves. Remove all roots, leaving nothing but the leaves remaining. New roots will sprout if the plants grow in the right conditions during the orchid revival challenge.
It’s called a challenge for a reason! Not all orchids will survive. They’re resilient plants, but extremely damaged specimens need lots of energy to recover. An orchid without green leaves or roots will struggle to photosynthesize and recover.
Step 4: Soak the Orchid
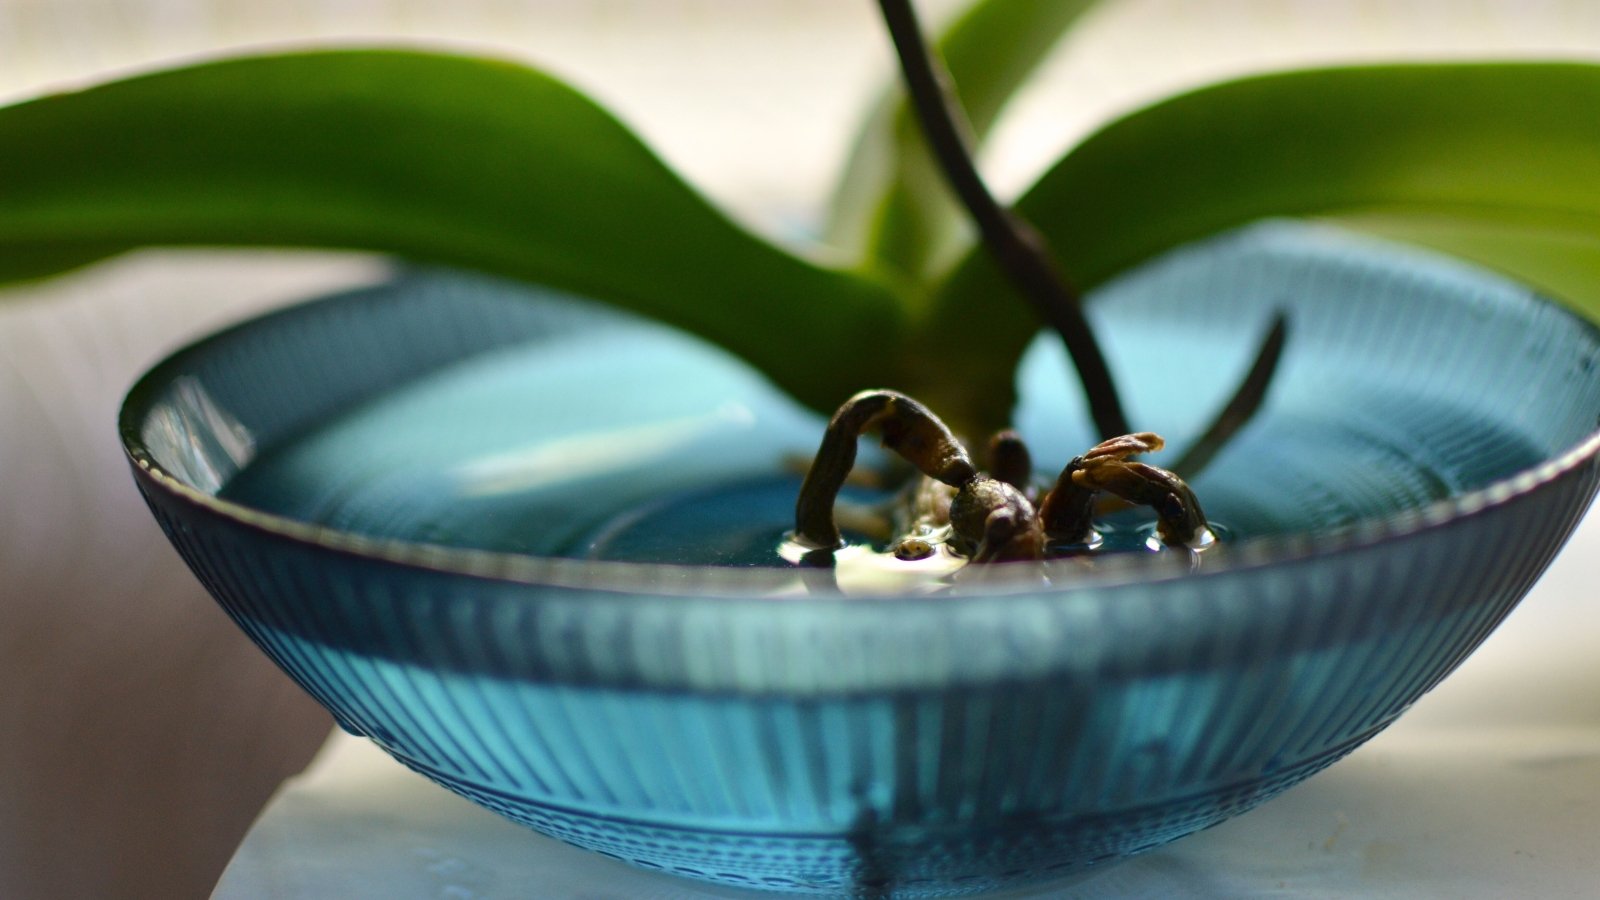 Even the driest leaves regain turgor after soaking.
Dry, underwatered plants benefit from a good soaking. Similar to epiphytic air plants, many orchids like soaking all their leaves and roots in water from time to time. Place forgotten or uncared-for specimens in a tub of water to rehydrate them.
Do this step before the repotting process to help it transition into its new home. A well-hydrated orchid will have more chances of reviving itself than an underwatered, shriveled specimen.
Leave the orchid in water for an hour or longer, and no longer than a full day. Remove it, let it dry, and set it nearby for the transplanting process.
Step 5: Repot the Plant
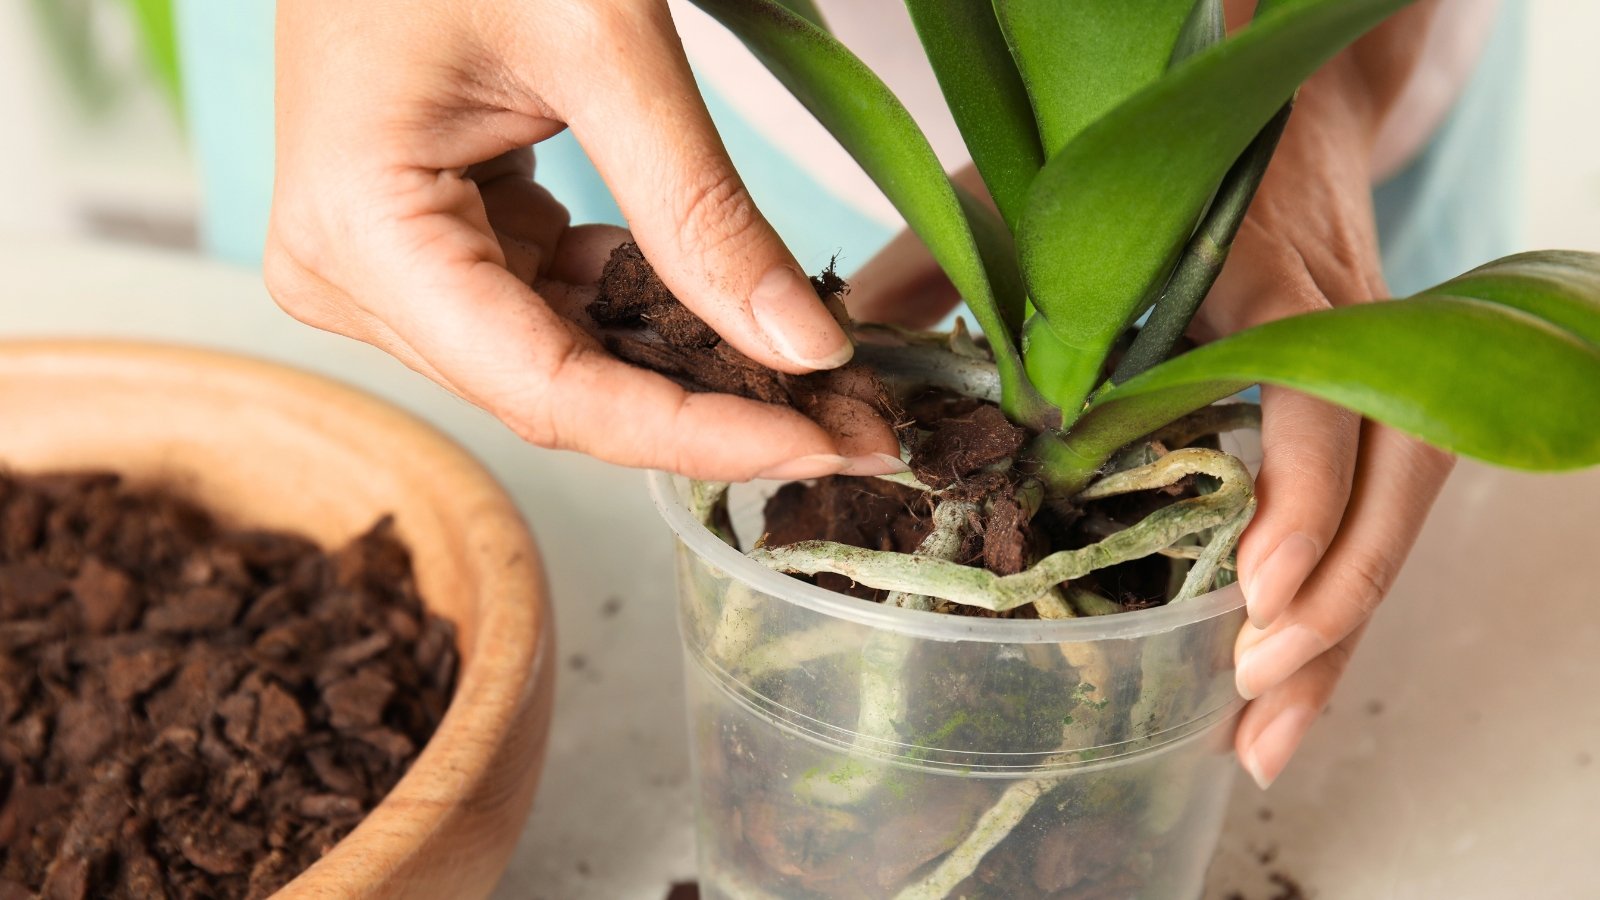 Bark mixes need frequent watering, moss slightly less.
Epicphytic, tree-dwelling species prefer growing in an orchid potting mix. It should have bark, moss, or both materials. Moss mixes need infrequent watering, while bark mixes require more frequent watering.
For the container, choose a medium-sized pot that the remaining roots will fit into, and ensure it has a drainage hole on the bottom. After the orchid revival challenge, snaking new roots will begin to poke out of the top of the container. Set a thin layer of moss, bark, or both materials on the bottom of the pot.
Place the plant inside the pot, and add more of the potting medium until the base of the orchid is covered. Water the pot well, letting the water drain freely from it. Then, set the pot on a saucer and place it somewhere warm and well-lit in your home.
Step 6: Provide Consistent Care
 Let the soil dry slightly before giving more water.
Moth orchids and similar types prefer bright, indirect light indoors. They need a well-lit spot, and dark rooms will not do. Some direct sunlight is okay, but too many hours of direct sunlight will cause burning and shriveling.
Orchids need warm temperatures during the growing season. In the fall and winter, they benefit from slightly cooler temperatures to initiate new flowering buds. Set them near a window or another bright spot away from heaters and A/C units.
Most orchids love humidity. Provide it with a pebble tray below the pot, or use a humidifier nearby to boost the humidity.
Orchids need regular fertilizer to grow their best. Use an orchid-specific fertilizer, or dilute an organic liquid fertilizer to a quarter of its strength and drench the leaves and roots. Do so once a month during the growing season.
The final care consideration, and arguably the most important, is watering! Give your orchid regular water, letting it dry out slightly before adding more. Don’t overwater, as this will prevent new roots from forming and cause the existing ones to rot. Err on the side of having a dry potting medium rather than a soggy one.
Step 7: Wait for Blooms to Appear
 Observing plant needs improves success with each season.
And that’s all there is to it! Growth will be slow in the first 30 days of the orchid revival challenge. After leaves and new roots sprout, growth will begin to speed up and increase as the growing season progresses. In the cool months, flowering buds will begin to form on spikes that emerge from the base.
Be patient after the repotting process. Rootless or leafless specimens may take more than a month or two to recover, and they may not fit into the tight timeline of this orchid revival challenge. Revival relies on patience, consistent care, and careful watering.
The longer you care for your orchid, the better you’ll get at recognizing its needs. Repot it every two to three years, and grant it conditions similar to those in its native range. A happy plant will reward you with colorful, elegant, and intricate blooms.
Key Takeaways
- Not all plants will take successfully to the revival challenge, but many orchids will! Don’t give up hope; if any of them have green, living parts, use these steps to rejuvenate them.
- There are hundreds of thousands of orchids. Consult specific care guides for rare or unique specimens.
- Moth orchids are great types to begin with. Start with them, then move on to more challenging species and cultivars.
- Blooms tend to appear once a year, but some species may rebloom throughout the seasons. Grant consistent care to encourage reblooming.
Frequently Asked Questions
Remove the old spikes and provide proper care to encourage more blooms.
It may be the wrong time of year for blooms, or your plants lack the nutrients they need to thrive. Follow these nine tips to encourage your orchid to rebloom.
Remove dead, rotting growth, provide fresh soil, and give the plant the care it needs to thrive. Provide bright light, consistent moisture, and frost-free weather.


 English (US) ·
  French (CA) ·