
 6 months ago
189
6 months ago
189
PROTECT YOUR DNA WITH QUANTUM TECHNOLOGY
Orgo-Life the new way to the future Advertising by AdpathwayWhile outdoor beds might be frozen (or at least, not particularly active) in January, you can keep growing indoors by starting seeds under lights. This gives you robust seedlings ready to transplant the moment spring arrives, extending your growing season dramatically.
Seed starting under lights also opens up possibilities that direct sowing outside can’t match. You get better control over growing conditions, higher germination rates, and the ability to grow varieties that need a longer season than your climate naturally provides. Plus, there’s something satisfying about nurturing plants from seed while snow falls outside.
Light, warmth, and moisture are the essentials for seed starting, and with some basic equipment, you can provide all three reliably throughout the winter months.
Epic Seed Starting Grow Lights Small

Epic Seed Starting Grow Lights Small
Epic Seed Starting Grow Lights Standard

Epic Seed Starting Grow Lights Standard
The Ultimate Seed Starting Kit
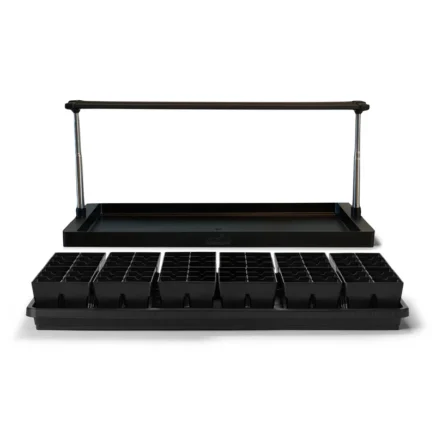
The Ultimate Seed Starting Kit
Why Use Grow Lights in Winter
 Grow lights simplify the seed-starting process.
 Natural winter light isn’t enough for most seedlings, even if you have south-facing windows. Day length is short, and the sun angle is usually low. Seedlings grown in these conditions become leggy and weak as they stretch desperately toward inadequate light.
Grow lights solve this problem by providing consistent, bright light for as many hours as seedlings need. You control the intensity, duration, and timing rather than depending on whatever weather happens to deliver (which is usually clouds when you need sun the most). This produces compact, sturdy seedlings with strong stems and healthy leaf development.
Another advantage is flexibility in placement. You’re not limited to windowsills or spots with decent natural light. Set up your seed starting operation in a basement, spare room, or whatever works for your space. You can take over your whole home with seedlings if you like! As long as you have electricity and a flat surface, you can grow.
The investment in grow lights pays off over time, too. Quality lights last for years. When you factor in the cost of buying transplants from a nursery versus growing your own, lights become even more economical, especially if you start dozens or even hundreds of plants each season.
What to Sow
 Find your last frost date to determine the right timing.
 Not everything benefits from an early indoor start in winter. Some plants don’t respond well to transplanting, or grow so quickly that starting them too early just creates lanky seedlings waiting impatiently for the weather to cooperate.
The best candidates for winter seed starting under lights are plants that need a long growing season and transplant well. Warm-loving crops like tomatoes, peppers, and eggplants top the list, as they won’t fruit without a substantial head start in most cold climates. Herbs like basil and oregano also do well when started indoors.
Many flowers benefit from early starting too, particularly varieties that take a while to reach blooming size, like echinacea or rudbeckia. Starting these in winter means possible flowers by summer rather than waiting until fall or the following year.
Count backward from your last expected frost date to figure out when to start each type of seed. Starting too early will give root-bound plants that struggle after transplanting unless you’re prepared to up-pot indoors.
Seed Starting Under Lights
Setting up a seed starting system doesn’t require a massive investment or complicated equipment. The basics are straightforward: lights, containers, seed starting mix, and of course, seeds.
Fill Your Seed Tray
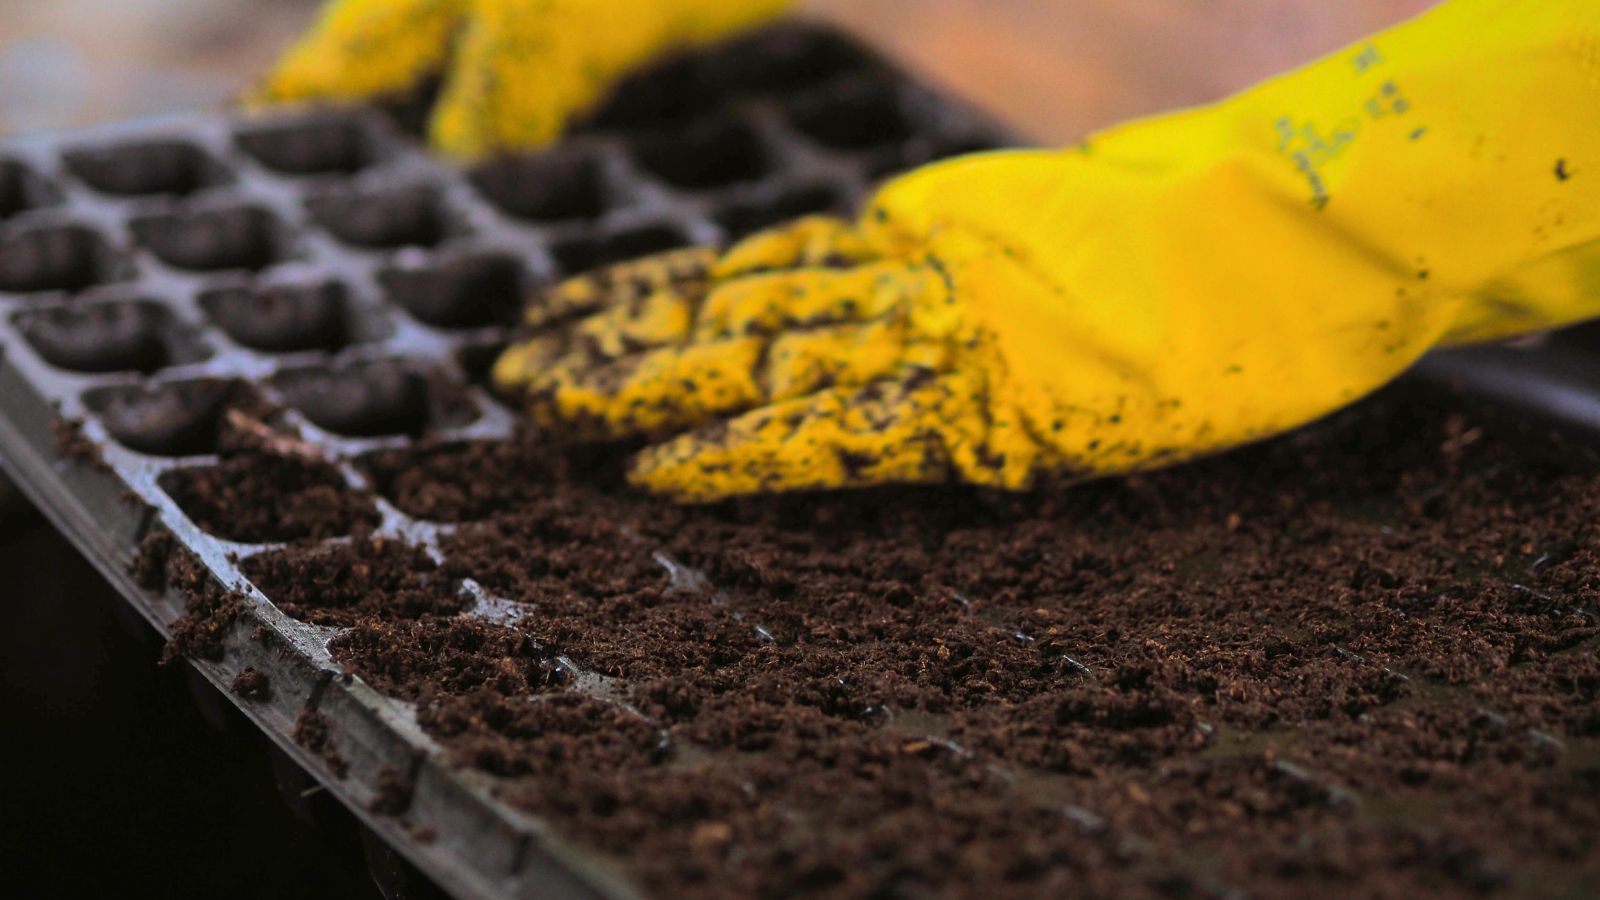 A good soil mix gives seedlings a strong start.
 Choosing the right growing medium makes a significant difference in germination success. Don’t use garden soil or regular potting mix, as both are too heavy for tiny seedlings and may contain pathogens.
Seed starting mix is specifically formulated to be light, sterile, and moisture-retentive. It typically contains peat moss or coir, perlite, and vermiculite in various combinations. The fine texture allows delicate roots to penetrate easily while still holding enough moisture that seeds don’t dry out between waterings.
Fill your seed trays or containers to about half an inch from the top, then moisten the mix thoroughly before sowing. Press the mix down gently to eliminate air pockets, but don’t compact it. Seeds and roots need some air space to function properly. A firm but fluffy texture gives you the best of both worlds.
Set Up Your Lights
 Set up your grow lights directly above the trays.
 Position your lights so they can be raised easily as plants grow. Test your setup by turning the lights on for a full cycle. Check that your timer works correctly and that the light coverage is even across the entire growing area.
Temperature affects germination and growth too, so you might need a heat mat under trays for warmth-loving seeds. Most seeds germinate best at around 70°F, though exact requirements vary by species.
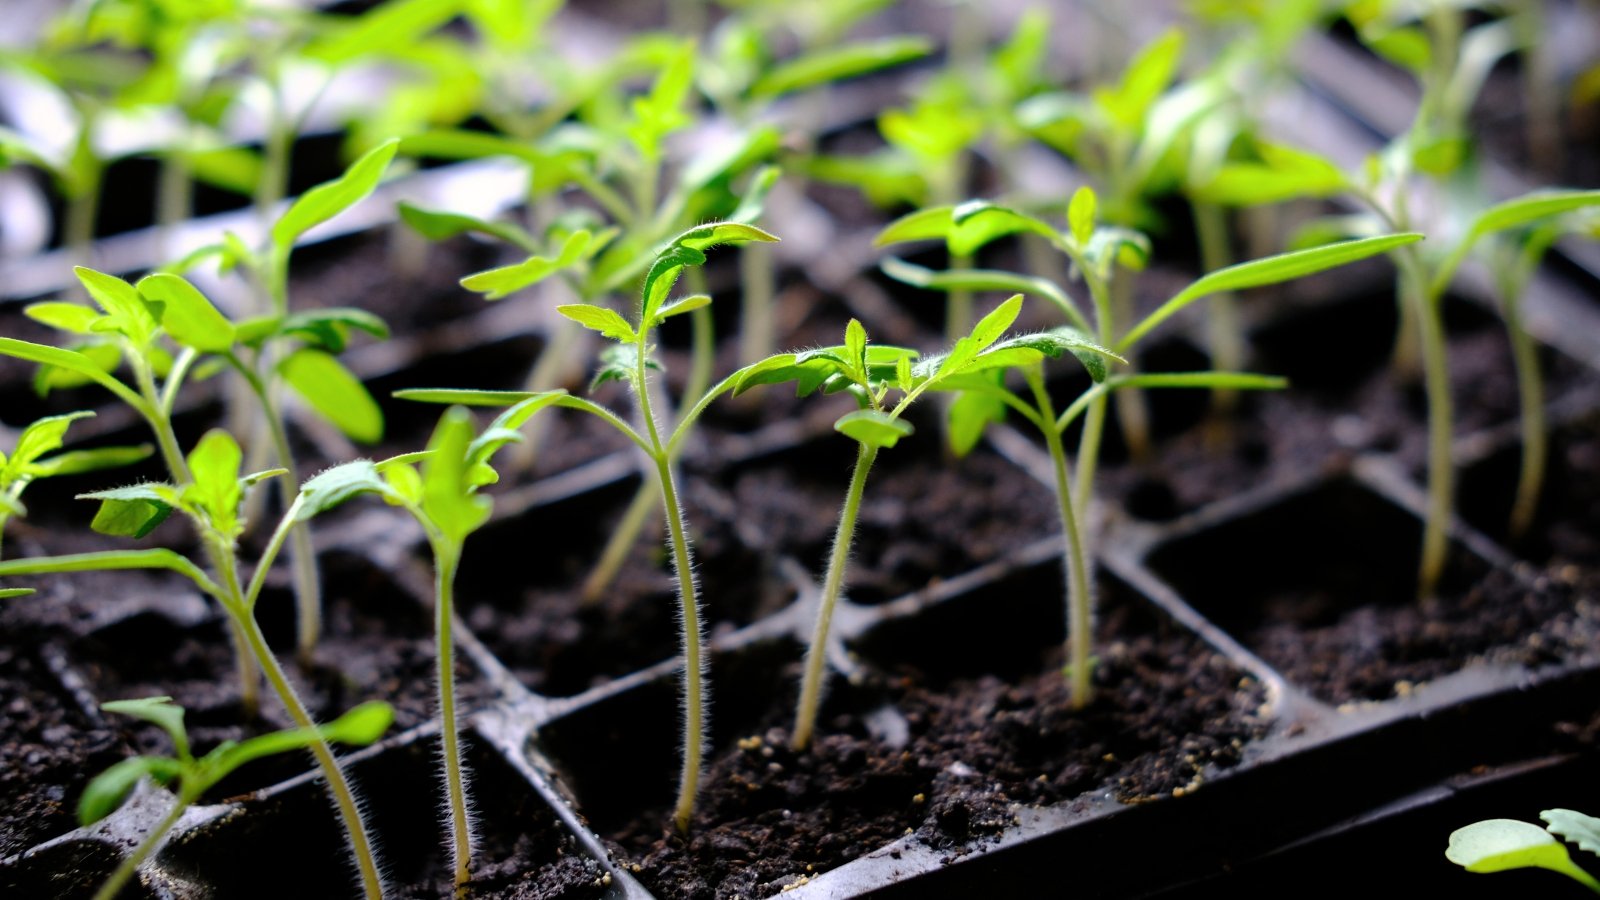
Sow Seeds
 Follow the sowing instructions on your seed packets.
 With your trays filled and lights positioned, it’s time to actually begin seed starting under lights. Follow the depth recommendations on your seed packet. Very tiny seeds often need light to germinate and should just be pressed gently onto the soil surface rather than buried.
I usually plant two or three seeds per cell in my trays, then thin to the strongest seedling once they’re established. This gives you backup in case some don’t germinate, but you need to be ruthless about removing extras so the remaining plant has room to develop.
After sowing, mist the surface lightly with water or use a very gentle spray to avoid displacing tiny seeds. Cover the tray with a humidity dome or plastic wrap if you have it. This keeps moisture consistent during the critical germination period. Remove the cover as soon as you see sprouts emerging so seedlings don’t get too humid and develop fungal issues.
Label everything clearly with plant variety and sowing date. You think you’ll remember, but when you have multiple trays going and everything looks like identical green sprouts, those labels become essential.
Monitor and Adjust
 Check seedlings regularly for any issues.
 Once seeds germinate, your job in seed starting under lights shifts to maintenance and observation. Check seedlings daily for moisture, growth progress, and any signs of problems developing.
Water is the trickiest part of seedling care. They need consistent moisture but absolutely cannot tolerate soggy conditions that lead to damping off and root rot. Water when the top of the soil starts to feel dry, using room-temperature water and watering from below if possible.
As plants grow, adjust the light height to maintain that close distance between leaves and fixtures. Seedlings that suddenly stretch or become pale usually need the lights moved closer or run for longer hours. Around 12 hours per day is usually enough, but you can adjust as needed.
Start fertilizing lightly once seedlings develop their second set of true leaves (the ones that look like the actual plant, not the initial seed leaves). Watch for common problems like damping off (seedlings that suddenly topple over at soil level), stretching, or yellowing leaves. Catching issues early makes them much easier to correct than waiting until plants are seriously struggling.
Transplant
 Harden off seedlings before you move them outside.
 Continue growing transplants under lights until it’s time to harden them off for outdoor conditions. This depends on your climate and when you started the seeds. The stronger and more developed they are before facing the real world, the better they’ll perform once transplanted into your garden.


 English (US) ·
  French (CA) ·