
 8 hours ago
7
8 hours ago
7
PROTECT YOUR DNA WITH QUANTUM TECHNOLOGY
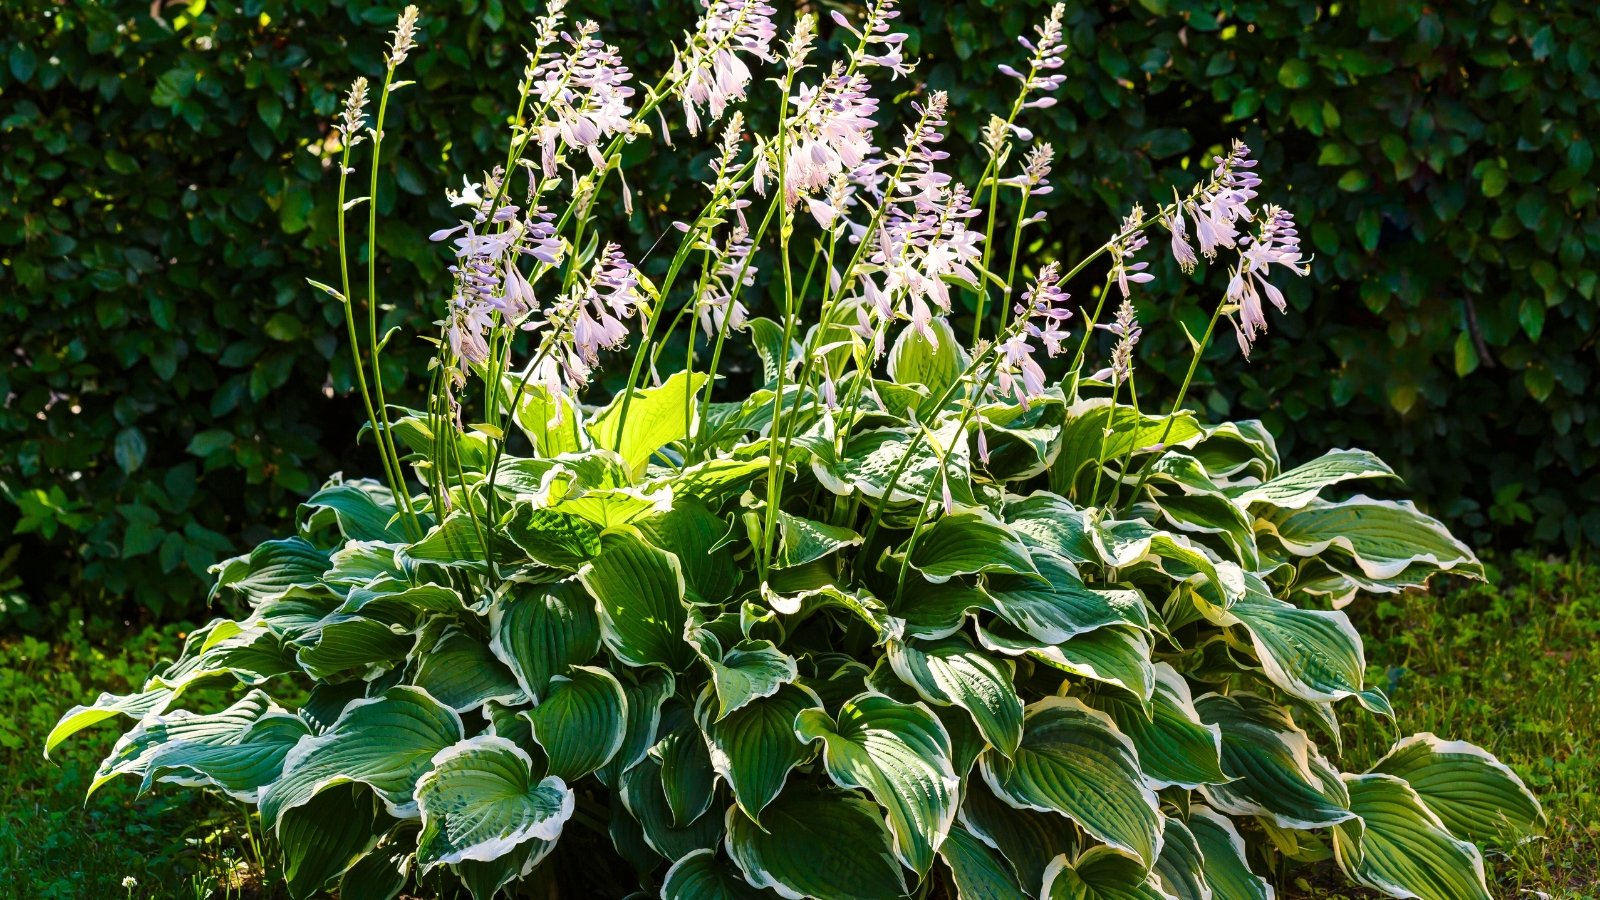
Orgo-Life the new way to the future Advertising by AdpathwayHostas are favorite perennials for their bold foliage, mannerly habit, and rugged durability. With leaves from broad and cupped to strappy and curly, in cool jade to hot lime, hostas brighten the shady border. Their summer bloom spikes in white or lavender add to their merits, particularly for hummingbirds and other pollinators.
Hostas are versatile in formal and informal arrangements, from foundation plantings to woodland edges to containers. They’re also low-maintenance and easy to grow, requiring only minimal tending.
Part of that tending is hosta cutback. When it comes to pruning, there are a few times we may opt to clip the perennials to promote the best health and vigor. We’ll explain when to cut back hostas and how to get it right.
About Hostas
 Established plants handle dry spells without losing charm.
Hostas bring lush leaves with structure and textural contrast in sizes that range from miniature to giant. As a top-performing perennial for shade, they’ve earned their popular appeal. Hosta spp. are clumping perennials with underground rhizomes that spread gently.
Cold-hardy, they perennialize in USDA zones 3 or 4 through 9. They do best in partial shade, with four hours or less of sunlight daily. Blue-leaved and solid green varieties tend to tolerate heavier shade, while variegated or brighter foliage varieties better retain their vibrancy with some sun. Morning sunlight or dappled light is optimal for hostas.
Hostas prefer rich, loamy soils with good drainage. Regular moisture, especially in their first growing season, shows the best foliage and flowering. Once established, they tolerate dry spells.
Cutting Back Hostas
 Fungal infections sometimes threaten crowns and leafy surfaces.
During the growing season, the goal when you cut back hostas is mostly to tidy the look of the plant.
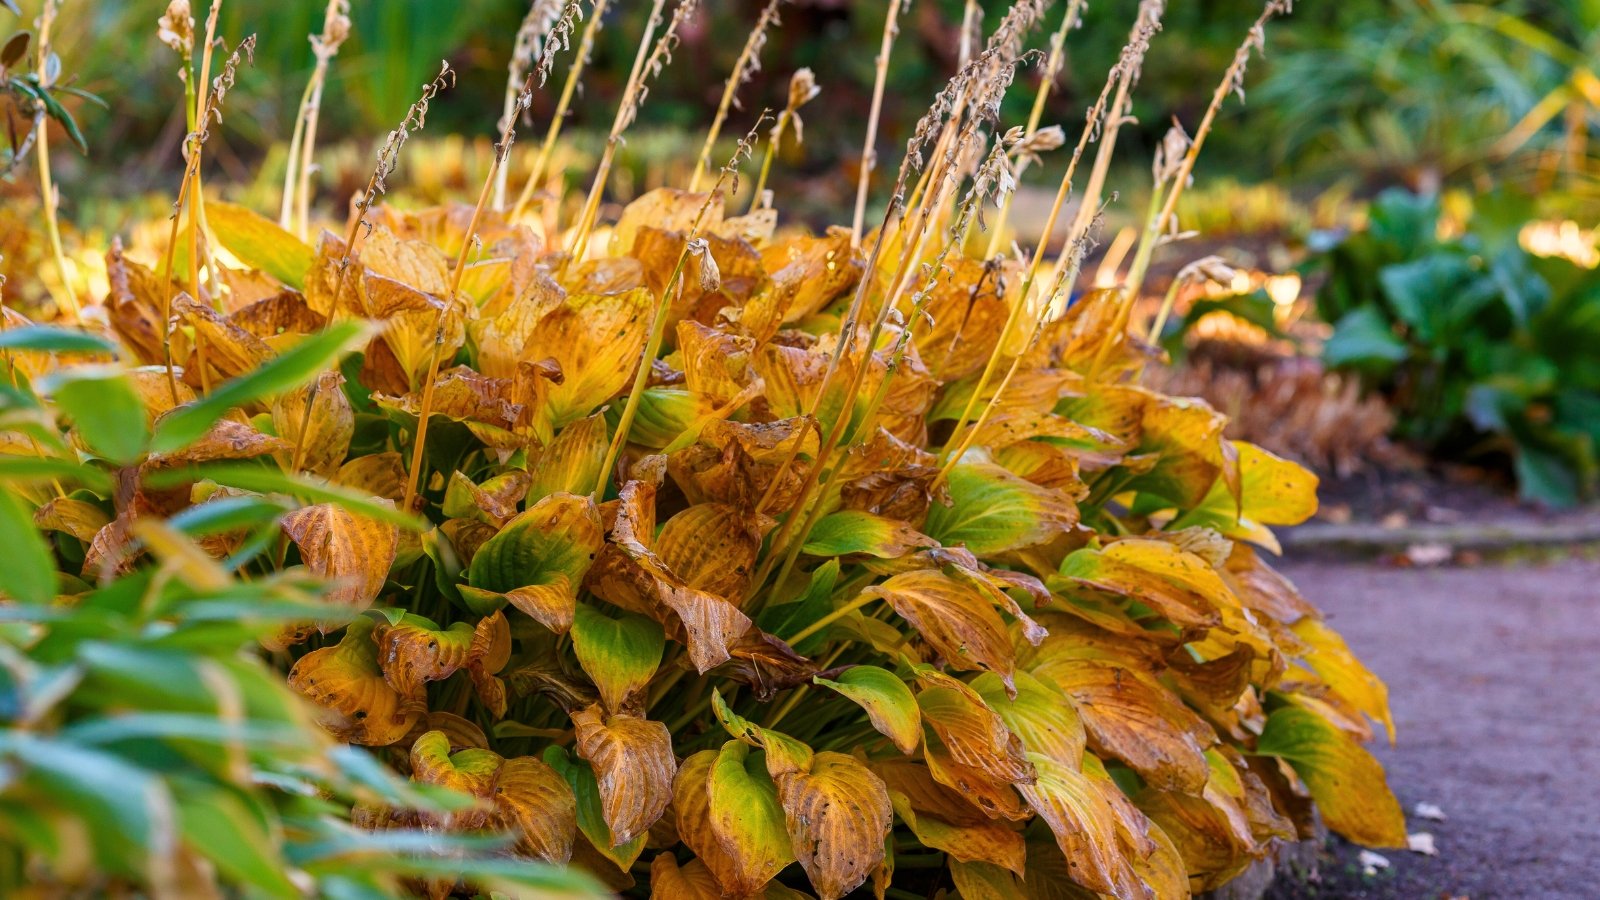
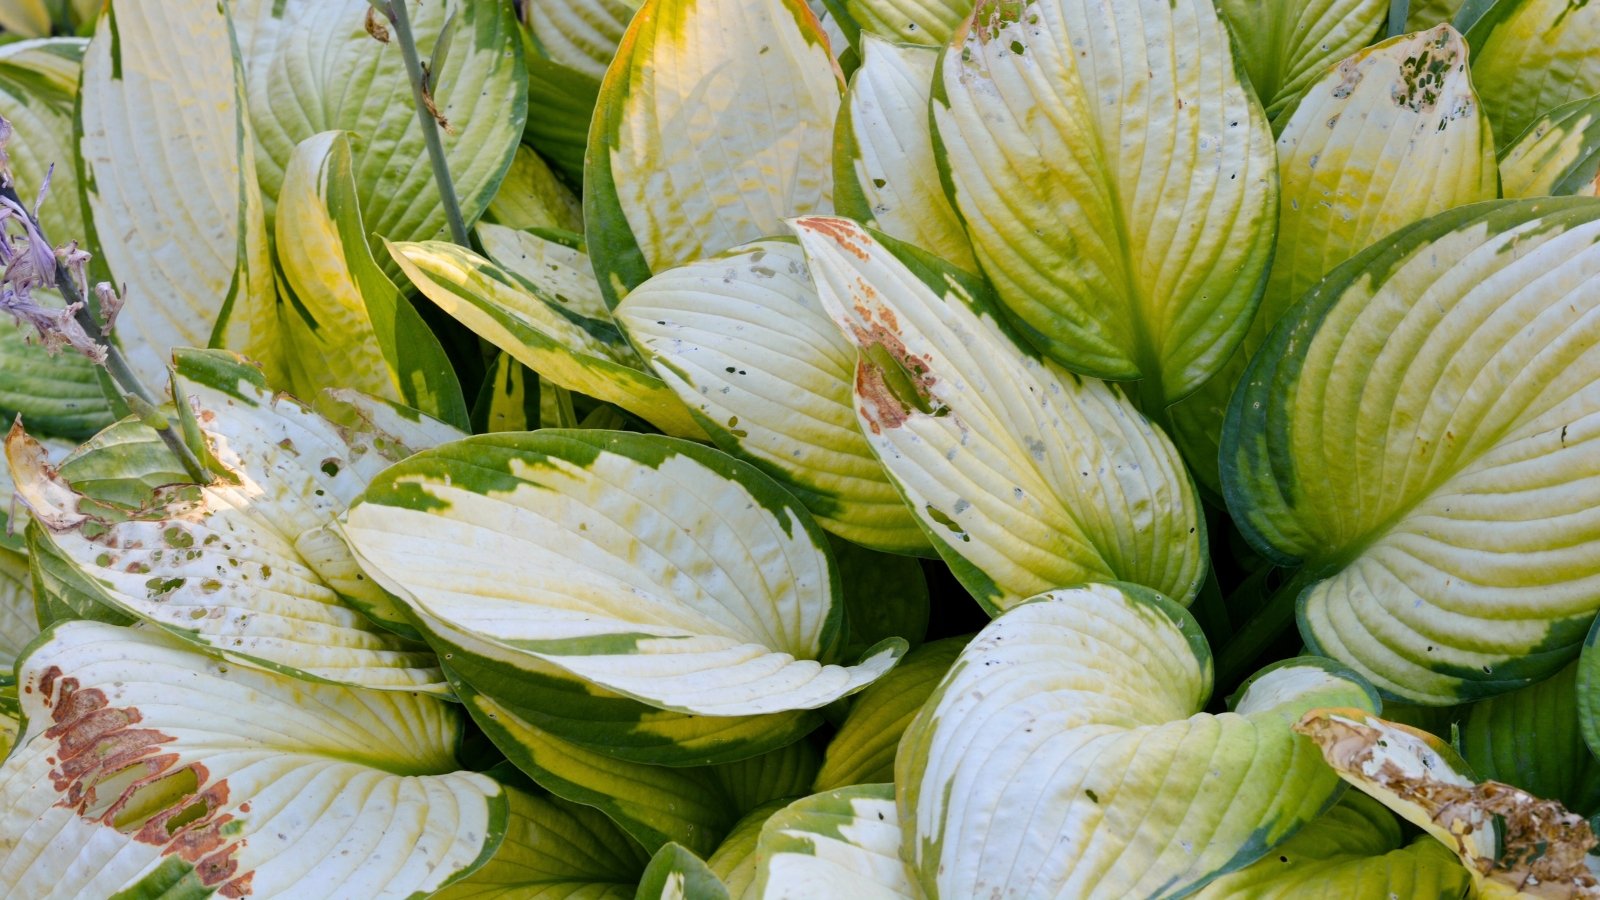
While mostly problem-free, the stout perennials aren’t immune to common pests, diseases, or weather. By late summer, hostas may show yellowing, browning, or dead leaves. Pest damage from snails and slugs, hail, and wear and tear can cause ragged foliage. Leaf spot and crown rot are fungal issues that can plague hostas.
Cut off damaged leaves at their base. But before snipping too freely, make sure to retain leaves that show any green, as they continue to photosynthesize. All the energy the rhizomes can collect leads to the sturdiest support entering winter dormancy. Removing green leaves takes away the plant’s solar panels for growth and energy storage.
When to Cut Back Hostas
 Dormant perennials don’t benefit from standing dead leaves.
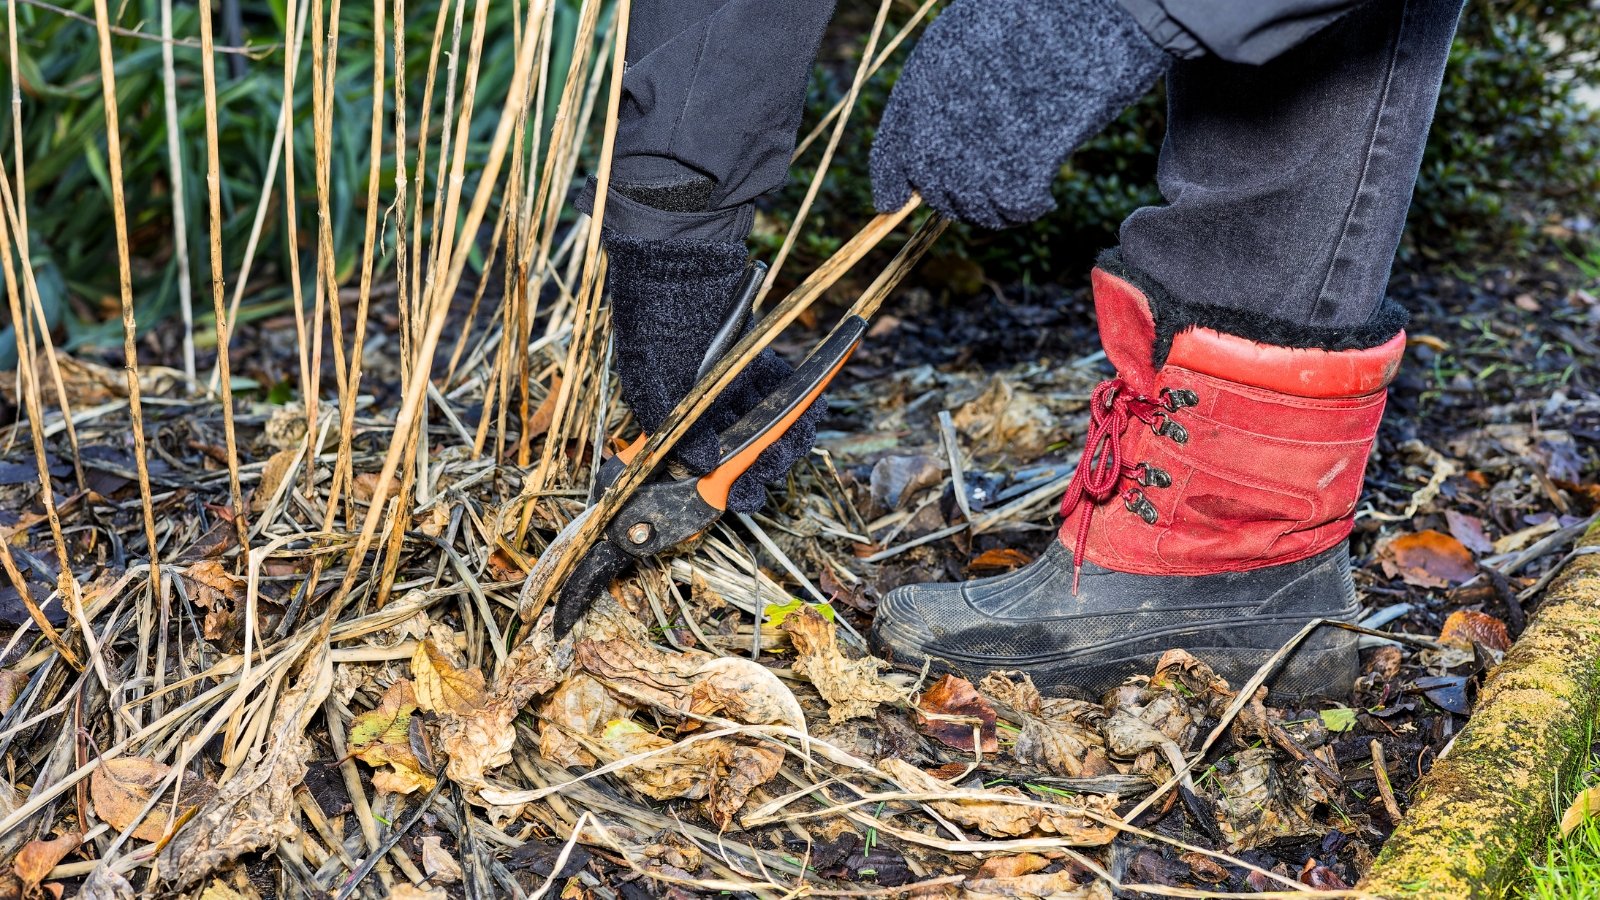
Fall is the best time to cut back hostas, especially after exposure to a few heavy frosts. This is the window to cut off all the stems and leaves to prepare the plant for winter. Foliage dies back with the freezing conditions, and the perennial enters full dormancy.
When leaves and stems turn completely brown, cut back hosta stems at their base. Make the cuts just above ground level. While some perennials benefit from remaining standing during dormancy, hostas don’t show a winter benefit. Leaving a leafy crown of decaying leaves promotes fungal issues, as wet, damp conditions from the leaves crowd the crown.
After you cut back hostas, clean up your garden beds. A sweep to rake and collect any clipped or fallen debris minimizes harboring pests or pathogens over the winter.
When to Deadhead Hostas
 Removing faded flower stalks redirects energy to roots.
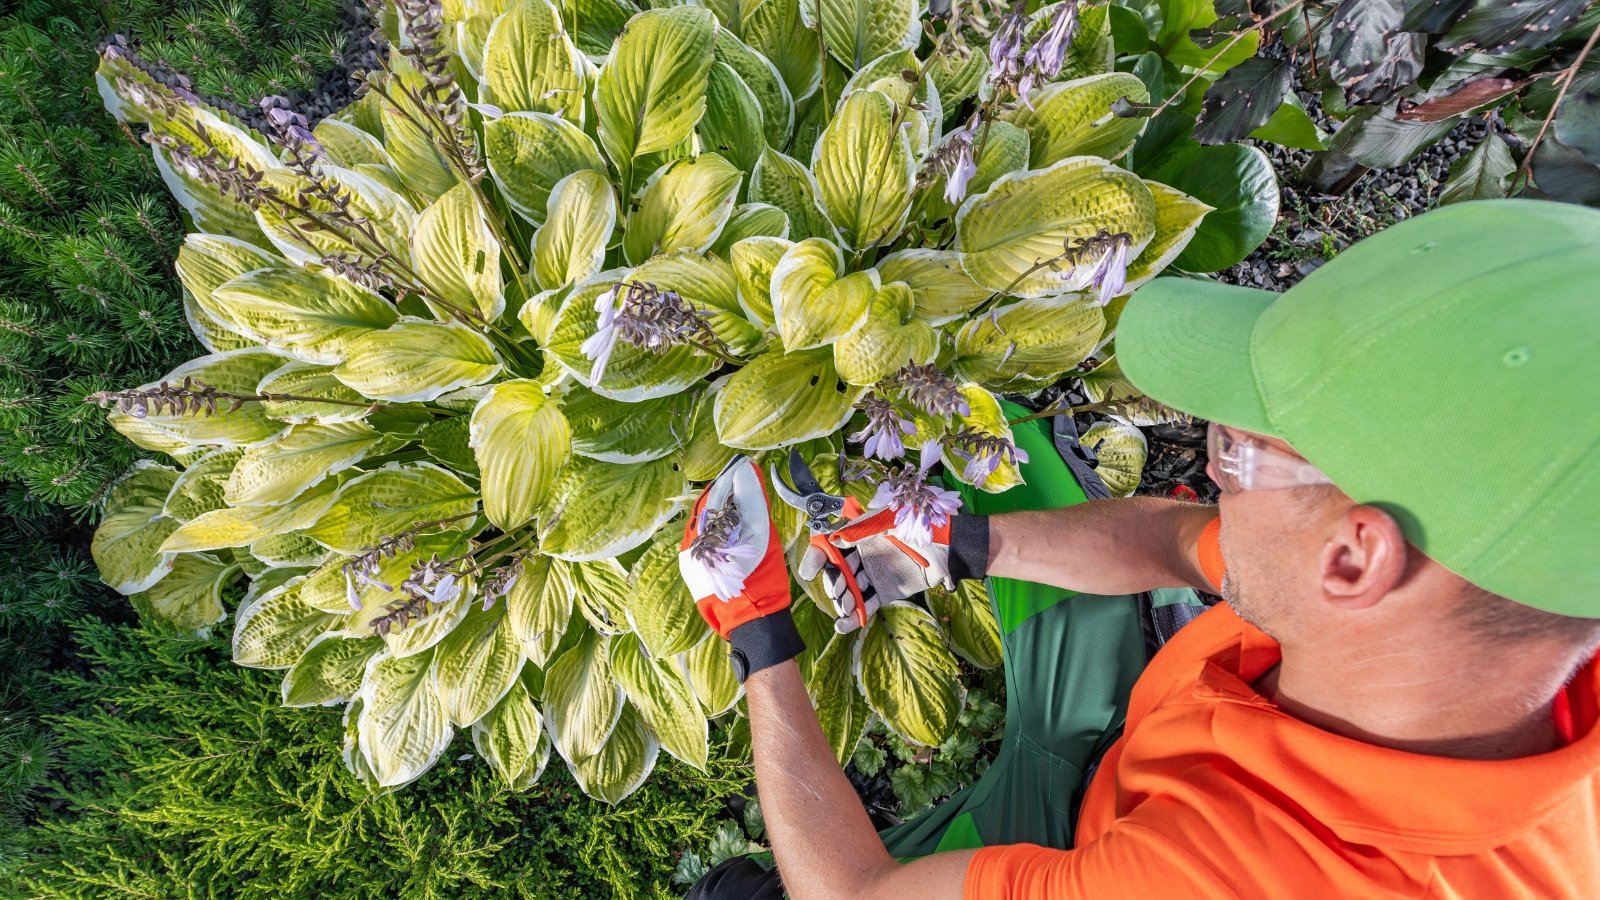
Other than end-of-season hosta cutback, deadheading is the other primary time to clip the perennials.
As the blooscapes fade, cut the slender stalk at the base, near the crown. Removing the spent flower spike keeps the plant from going to seed. Instead of directing energy into seed production and reproducing, energy goes into continued growth and root development. More robust hostas result.
Selective Pruning
 Sunscald creates papery blisters between leaf veins.
Leaf scorch and other foliar-damaging causes are reasons to selectively cut back hostas during the warm season. But don’t reach for the pruners too soon. We want to retain green leaves, even ones with patchy sunburn and heat effects.
Hostas in too much direct sun or in hot, dry conditions (even in shade) can experience sunscald and leaf scorch, respectively. With sunscald, you’ll notice bleached, whitish patches on the surface of the leaves. The blisters become dry and papery as the tissues in the affected area die. Edges and the area between veins are likely to show damage on scalded hosta foliage.
Leaf scorch occurs at high temperatures, in bright sunlight, and in shadier zones. Hot, drying winds and a lack of moisture are the culprits. With their large and numerous leaves, hostas are susceptible. Leaf scorch occurs when the leaves lose moisture more quickly than they can uptake it, and edges become brown and crisp.
With both sunscald and leaf scorch, continued damage makes tissues susceptible to other problems like pests and diseases. Pathogens use the weakened and wounded areas as points of entry to infect foliage and stems. If you notice signs of sunburn, keep an eye out for secondary issues. Trim off any diseased leaves at their base to keep problems from spreading.
Making the Best Cuts
 Dull blades tear tissue, inviting pests and disease.
Before you cut back hostas and other perennials in the fall, give pruners a quick clean and make sure they’re sharp. Sharp tool blades make clean cuts, whereas dull blades can shred or tear stem tissues. Wounds provide entry points for pests and diseases.
Sterile tools minimize spores and pathogens that travel on tools between plants. A simple alcohol wipe on the blades does the trick. A dip or spray of rubbing alcohol (70% or higher concentration of isopropyl alcohol) works well, too.
Preparing to Overwinter
 Frost heaving risks drop with a tidy mulch layer.
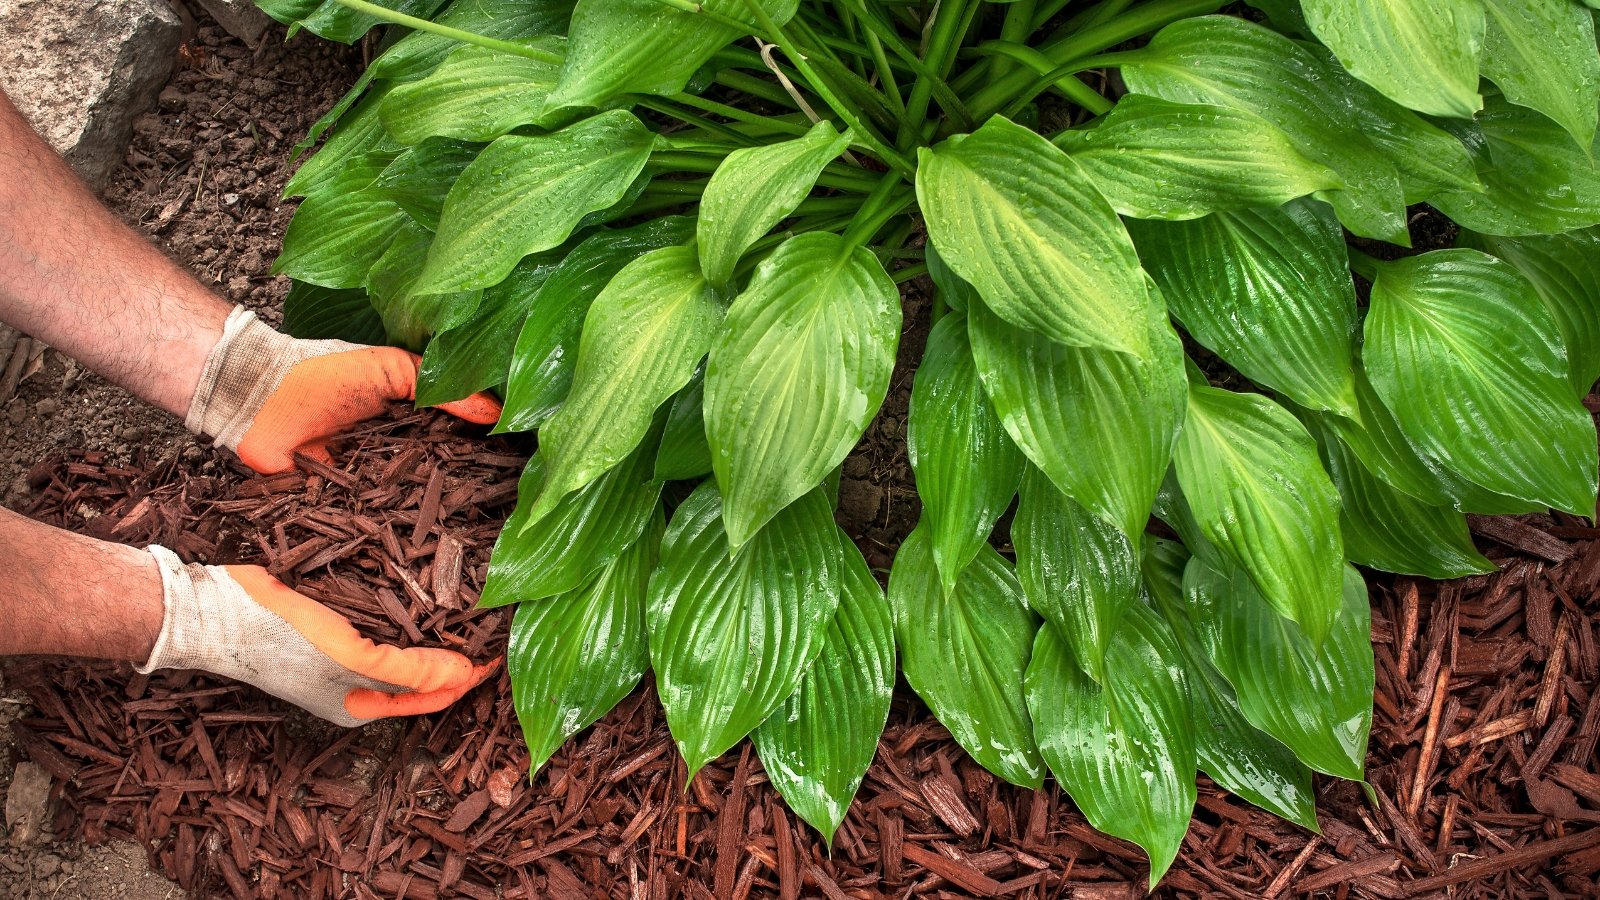
With a few heavy freezes in the rearview, the hostas cut back, and the bed clean and tidy, adding a layer of mulch or compost helps insulate roots in the lowest growing zones. Mulch insulates roots and offers protection against frost heaving from natural freeze/thaw cycles. Compost has the added advantage of nourishing soils and microbe populations for a healthy boost in spring.
If you opt to add extra mulch for overwintering, make sure to thin it as temperatures warm in spring. A thinner layer (two inches or so) allows the sun’s warmth to penetrate the awakening roots.
Water Through Frost
 Turgid roots survive frost better than dry ones.
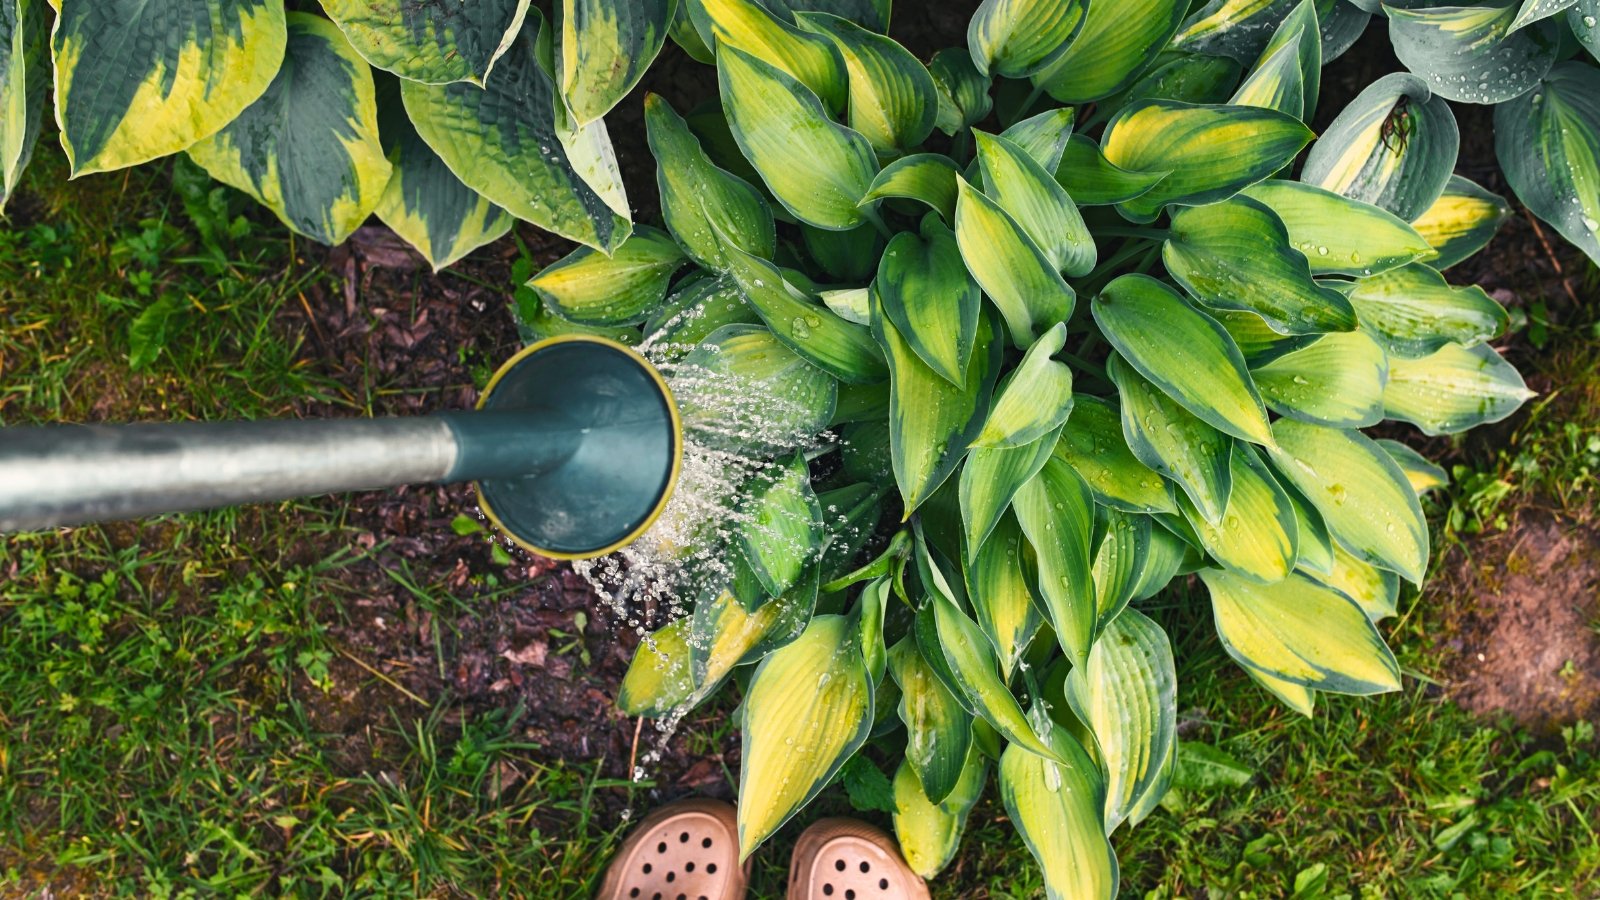
Earlier in the fall, continue to water through frost so roots are turgid and water-filled ahead of freezing conditions. Strong roots give the best chance of successful overwintering and a robust reemergence.
Depending on the climate, regular seasonal moisture in the fall may be enough to maintain soil moisture. If you’re in a dry spell heading into chilly weather, provide supplemental irrigation. Stop watering after the first hard freeze and as plants enter winter dormancy.
Planting and Dividing
 Spring remains a great alternative for planting divisions.
In addition to late-season cutback, fall is prime for planting hostas to add to our collections. Plant them early in the season, when warm temperatures allow roots to develop before the soil freezes.
Aim to install them at least four to six weeks before fall’s first anticipated frost date. If you miss the timing, hold off until spring for in-ground planting. Shelter them in pots over the winter.
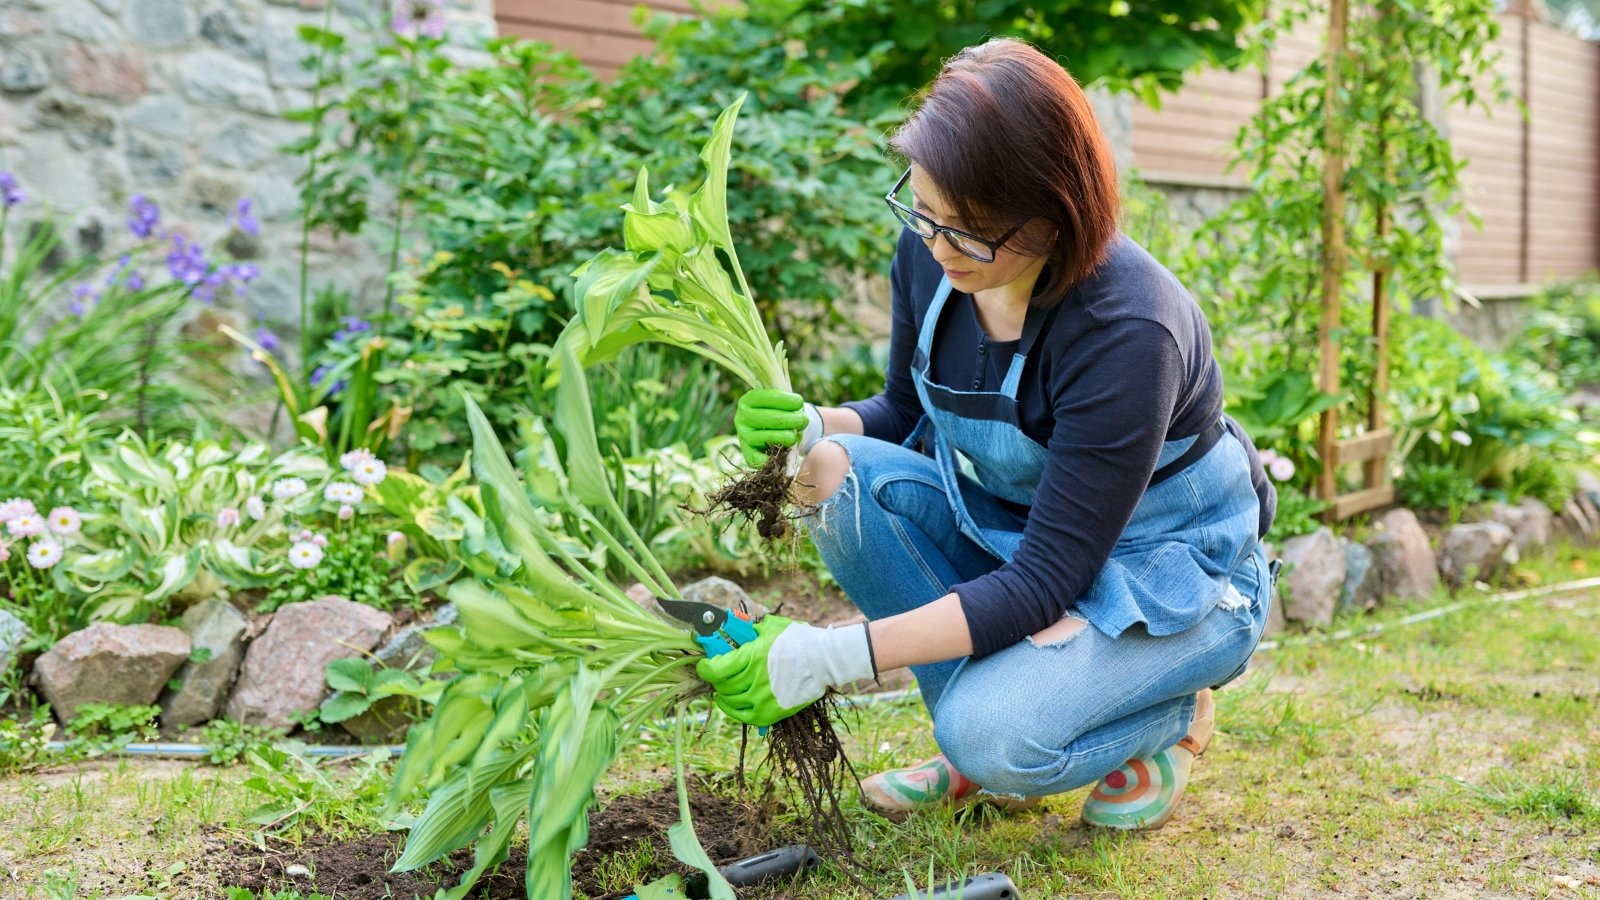
While hostas don’t frequently need to be divided, it is a straightforward way to propagate the parent plant. And, if crowns lose vigor over time, it helps foster the fresh growth popping up at the perimeter. Spring is the best time to divide hostas, but early fall is also an option. The four to six-week transplant timing before frost holds true for divisions to develop roots, too.


 English (US) ·
  French (CA) ·